Jump Rope For Beginners Tutorial: How To Start Step By Step
How To Jump Rope Correctly For Beginners: Stop Tripping So Much
Nobody is born good at jump rope.
I definitely wasn’t.
When I started, I was tangling my feet every three or four reps.
And here’s what fixed it.
Advertisement
It wasn’t trying harder.
It was doing less.
Less arms.
Less jump.
Less effort.
On today’s episode of Live Lean TV, I’m teaching you, step by step, the 5 basic fundamentals of how to jump rope correctly for beginners.
Lock in these 5 steps and you’ll quickly get to completing 5 continuous minutes of the basic bounce jump rope exercise.
That’s the goal.
Once you can do that, you’ve earned the right to progress and start learning other jump rope tricks.
Table Of Contents – Jump To Links
- Fundamental #1: Jump Rope Length For Beginners: Most Get This Wrong
- My Favorite Jump Rope: Crossrope Get Lean Jump Rope Set
- Fundamental #2. Jump Rope With Perfect Form: Step By Step Set Up
- Fundamental #3: Jump Rope For Beginners: How High Should You Jump
- Fundamental #4: Jump Rope Wrist Technique: Why Your Arms Are Wrong
- Fundamental #5: Jump Rope For Beginners: Drop The Rope And Do This First
- Jump Rope For Beginners: How Many Minutes Per Day
Let’s start with the first fundamental that most beginners skip, and it has nothing to do with how you jump.
Fundamental #1: Jump Rope Length For Beginners: Most Get This Wrong
Most beginners are using a jump rope that doesn’t fit them properly, which is why most people quit during the first week of training.
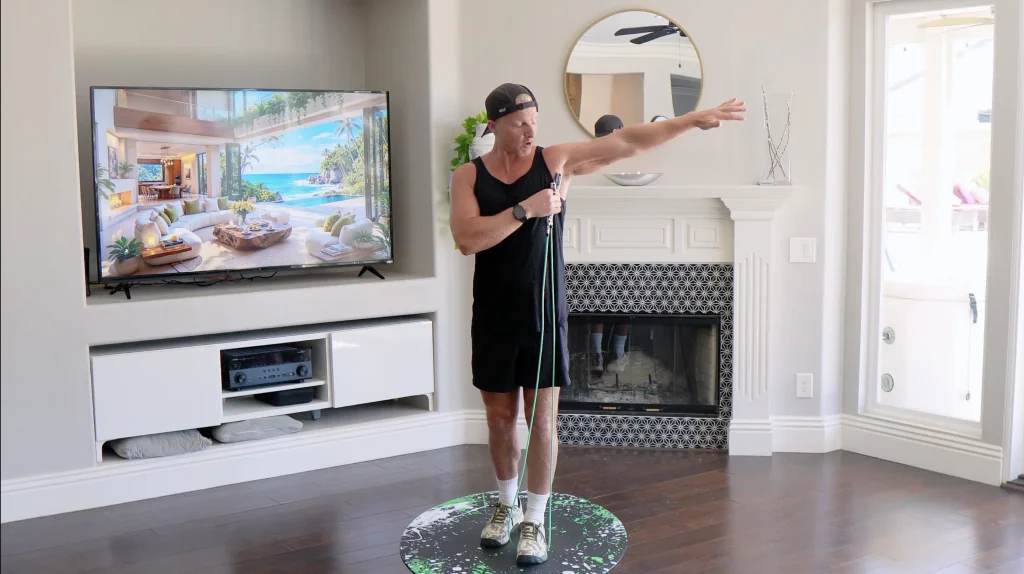
Here’s the easiest way to find out how long your jump rope should be:
- Step onto the middle of the rope with one foot.
- Then pull both handles straight up your body.
- The end of the cable should reach about nipple height on your chest, and the top of the handles should land right around your armpits.
However, if you’re ordering a jump rope online, the total length of the rope should be about three feet longer than your height.
I’m six feet tall, so I need a nine-foot rope.
This is important because if the jump rope is too long, it drags on the ground and loses tension, which kills your momentum.
And if your jump rope is too short, it’ll clip your feet every single jump.
My Favorite Jump Rope: Crossrope Get Lean Jump Rope Set
Once you have the jump rope sized properly, you also need to be aware of the quality and durability.
I’ve broken a lot of jump ropes over the years.
Cheap ones snap off at the handle, or the rope is a cheap quality so it’s too light to spin properly.
This is why I use the Classic Get Lean Jump Rope Set from today’s sponsor, Crossrope.
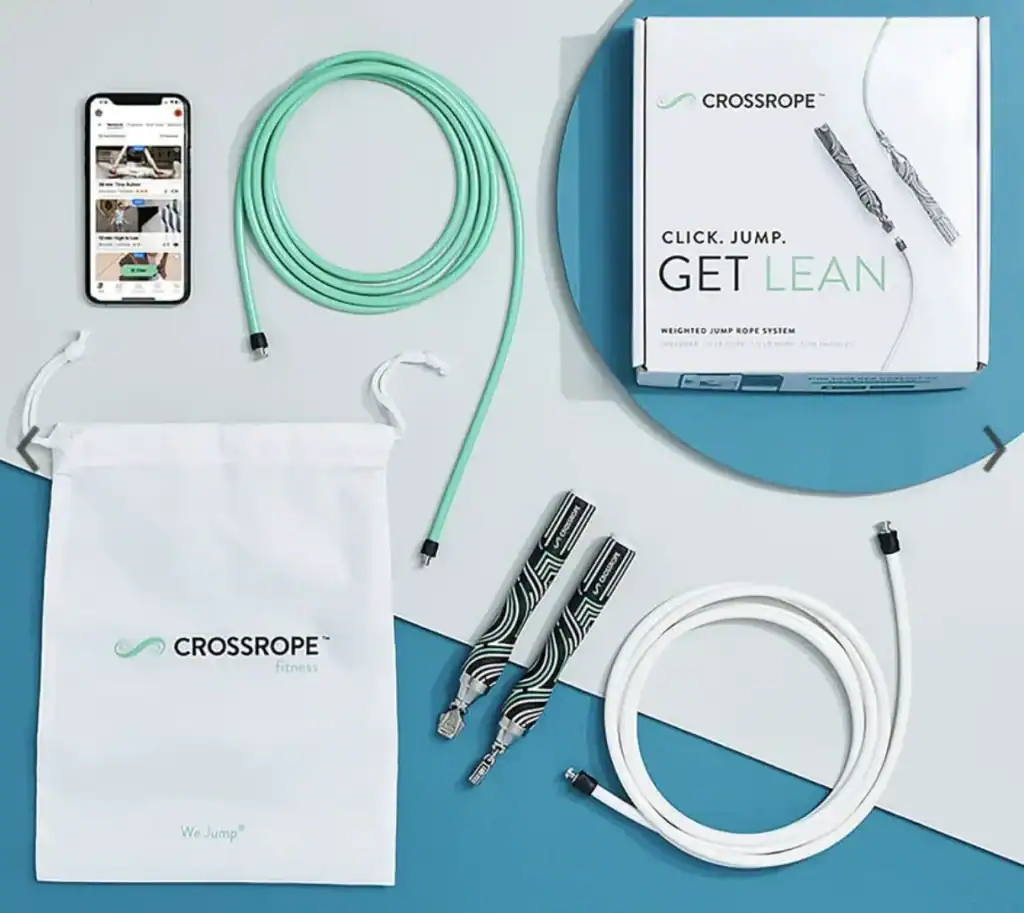
And for a beginner, Crossrope ropes are great because they’re weighted.
And that actually makes them easier to learn on, not harder.
With a cheap jump rope, it’s essentially weightless, so you can’t feel where the rope is during the spin, so you jump too early or too late.
With a weighted rope, you can feel it travel over your head and under your feet.
So your brain gets actual feedback on the timing, and your rhythm clicks way faster.
The Get Lean Jump Rope Set from Crossrope comes with a quarter-pound and a half-pound rope, plus slim handles that are fast-clip, so you can swap rope weights in seconds.
They’ve got over 28,000 five-star reviews and there’s a 60-day money-back guarantee.
So if it’s not for you, send it back.
Advertisement
Plus you can get 15% off when you use discount code LIVELEAN at this Crossrope discount link.
Now that you have the proper jump rope, let’s jump into fundamental number two to get you set up properly.
Fundamental #2. Jump Rope With Perfect Form: Step By Step Set Up
If the jump rope keeps hitting your toes, it’s not your feet.
It’s your hands.
Here’s your perfect jump rope form setup to jump rope properly.
I recommend you film yourself from the front, or stand in front of a mirror to make sure these steps are locked in:
- Stand tall with your chest up, shoulders pulled down and back, and eyes straight ahead, not down at your feet.
- Hold the handles with a light grip, not a death grip.
- Keep your elbows unlocked and pulled in close to your ribs, not flared out wide.
- Your hands and wrists should be positioned just outside your hips. Not up here by your chest, not down by your thighs.
- When your hands travel away from your body, you just made the rope shorter, which makes it hit your toes.
- When your hands are tight to your body, your body stays right in the middle of the rotation, so the rope travels the same distance over your head as it does under your feet.
That’s the whole game.
Now that your setup is locked in, let’s talk about the jump.
Fundamental #3: Jump Rope For Beginners: How High Should You Jump
When it comes to jump rope, most beginners jump way higher than you need to.
And it’s probably hurting your shins and knees.
Think bounce, not jump, while staying on your toes and the balls of your feet, not flat-footed.
Keep your knees soft so you’re absorbing every landing.
If you lock your knees out, you lose all your bounce and drive that impact straight into your joints.
If you’re doing it right, you should feel it in your calves.
And here’s the number that matters.
You should only be bouncing one to two inches off the ground, so you barely clear the rope as it passes underneath you.
Most beginners jump way too high over the rope and kick their heels back.
This is a waste of energy and causing more unnecessary impact on your joints.
If you hearing a thud when you land, you’re jumping too high.
You want each low bounce to be quiet like a ninja.
This is what gives you speed and coordination.
Train on a jump rope mat like this one from Crossrope, or on wood or rubber gym floor instead of concrete.
And wear shoes with some cushion under the forefoot.
Which brings me to fundamental number four, the one that separates people who jump rope from people who fight a jump rope.
Fundamental #4: Jump Rope Wrist Technique: Why Your Arms Are Wrong
If your shoulders are burning out after sixty seconds, you’re spinning the rope with the wrong body part.
The jump rope revolves with your wrists and forearms, not your upper arms.
The goal is to create small circles from the wrist, with a little help from the forearm, with your upper arm barely moving.
Your shoulders will feel an isometric burn, because they’re holding position, but there should be very little movement from the elbow up.
This is what keeps the rope tight and lets you spin it faster around your body.
And when you get it right, it should look effortless.
Now let’s put it together, starting with no rope at all.
Fundamental #5: Jump Rope For Beginners: Drop The Rope And Do This First
If you’re brand new to jump rope, put the rope down.
I’m serious.
It’s important to first separate the two skills, because trying to learn both at once is why people quit on day one.
To start, just bounce 1-2 inches off the ground in place, on the balls of your feet, with your knees soft.
During every bounce, visualize the rope passing underneath your feet.
Do this for 30 seconds to get the rhythm down before you add the rope.
Now let’s put this all together.
Pick the rope up and take one single bounce over the rope, then stop and reset.
Then complete two in a row, then stop and reset.
Then complete three in a row, then stop and reset.
Now that you’ve trained your mind-to-muscle connection, set the timer for 5 minutes and complete as many continuous bounces as you can.
You got this.
Jump Rope For Beginners: How Many Minutes Per Day
As a beginner, you don’t need long jump rope sessions.
You need frequent ones.
Practice jump rope three to five minutes a day, four to five days a week.
That’s it.
Short and frequent beats long and occasional every time when you’re learning a skill.
And the easiest way to make it stick is to use it as your warm up before strength training.
That’s exactly what I did.
It’s already in the session, so you never have to find time for it.
Once you lock in these 5 fundamentals and started practicing a few minutes before every lift, your coordination will click and the movement becomes automatic.
Nobody is born good at this, so practice makes perfect.
And your benchmark is five minutes.
Once you can hold the basic bounce for five straight minutes without tripping, that’s when you can start incorporating other jump rope tricks like double unders and crossovers.
Plus you’ll get leaner, your conditioning goes up, and you’ll feel better across the board.
Drop a comment and tell me which of these jump rope tips helped most.
Click the social media buttons to share this with your friends and subscribe to my Live Lean TV YouTube channel for more tips to Live Lean 365 days a year.
If you want a chance to win a Crossrope Get Lean Jump Rope Set, go try my 10 Minute Jump Rope Workout For Beginners and leave a comment on the YouTube video to enter.
Keep Living Lean.
BROWSE MORE EXERCISES TO LIVE LEAN!

Brad Gouthro is the founder of Live Lean TV, a media company focused on helping men and women “Live Lean” 365 days a year. Brad’s programs and content have helped millions of people all over the world learn how to get in shape, and more importantly, sustain it for life.